Vanilla Marshmallows - Keto | Paleo | Low Carb | Dairy Free | Gluten Free
- krysten
- Sep 6, 2019
- 4 min read
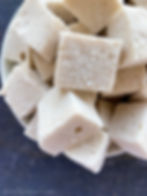
This is what marshmallow dreams are made of! I had this idea that could have either been BRILLIANT or a total flop. I debated on whether I should try it at all because I really didn’t think it could work, but I’m so glad I did because look how it turned out!

If I ever had an idea, I try it, I know that I could fail and sometimes that can suck for sure, but when your idea is a winner, the feeling surpasses any kind of negative “fail” — also I always learn from what fails and see how I can tweak it for next time.
Here are a few notes:
Make sure you aren’t interrupted at all during the process from start to finish. Have everything ready to go before you start, because things need to progress quickly.
I used NuNaturals Pourable Stevia Vanilla flavored Syrup to make these extra no carb and no sugar. I have never made them using any other brand of stevia or monk fruit syrup, so I don’t know if it will work if you use something else. If you try it, and it does work, let me know in the comments below. If you want to use real maple syrup (which I have done before), you totally can. It’s pretty delicious with real maple syrup (I prefer to use The Maple Guild Organic Maple Syrup). See maple syrup directions below.
While these marshmallows technically have 0g carbs and 0g of sugar (making them keto friendly), I do, however, use arrowroot starch to coat them (less than 1.5TB = 12g carbs). So, honestly, they do have a little bit of carbs if you use arrowroot to coat your marshmallows. Not every bit of that 1.5TB will actually stay coated, as most of it will fall off into your bowl. Use if you like and, if not, then just know your marshmallows will be super sticky and could stick to each other.
These marshmallows have a slight vanilla flavor from the Vanilla NuNatruals Syrup. I tried it with the Maple flavor, but we didn’t like them as much.
You can use a hand mixer or stand mixer — both will work, though my directions will be for a hand mixer.
Lastly, they are soft and pillowy, great to pop in your coffee, hot cacao or just eat plain for a sweet snack or treat. Cut them into as big or small pieces as you prefer. I cut my marshmallows into about 24 pieces. The size of your pan will determine the size of your marshmallows. The smaller the dish, the larger the marshmallow. You can use an 8 x 8 dish or or even a large glass Tupperware dish.


GRAMS OF SUGAR: Maple Syrup: there are about 212g of sugar per batch. Cut into 24 pieces that’s about 9g of sugar per pillow marshmallow. (See Maple Syrup directions below)
NuNaturals Vanilla Stevia Syrup: there are 0g of sugar in the whole batch, making that 0g of sugar per marshmallow. Hah!

__________
prep time: 5 min
cook time: 10 min
INGREDIENTS:
1/2 cup water
1 1/2 TB Arrowroot Starch, divided
Directions:
In a large mixing bowl, add gelatin and water, stir and allow to sit while you prepare the syrup.

Prepare a small glass dish or 8 by 8 pan with parchment paper. Lightly spray it with olive oil or coconut oil spray and about 1/2 TB arrowroot starch.

Have a hand mixer or stand mixer ready to go, plugged in and ready to turn on the moment it’s needed. You can't waste any time in between steps.
In a medium size sauce pan, add the whole pouch of NuNaturals Vanilla Stevia Syrup and turn on medium heat. Allow it to reach boiling point and bubble for about 20-30 seconds and then turn off heat. This could take 2-3 minutes.


Pour the hot syrup slowly into the large mixing bowl of gelatin and water (which will have hardened — that’s okay!). As soon as syrup is poured in, turn hand mixer on and mix at a low speed for about 20 seconds to break up the hardened gelatin.

Crank the mixer up to HIGH speed and mix for about 6-7 minutes. It will turn white after a few minutes of mixing and thicken quickly so watch it. Depending on how fast your mixer is, the time could vary.
Once the outside of your mixing bowl has mostly cooled and your mixture is thick & glossy, pour it into the prepared baking dish. It should POUR or fall with grace. If you have over mixed it then it will harden pretty fast.


DON’T WORRY — it’s not too late to fix your marshmallows if they have hardened too fast. If you’re using a glass mixing bowl, pop it in the microwave (something I don’t normally use or recommend ever) and cook it for about 10 seconds. This should loosen it up enough to pour into your baking dish.
Sprinkle about 1/2 TB arrowroot starch on top (optional).
Allow marshmallows to sit for at least 35-40 minutes at room temperature.


Remove marshmallows from the dish by lifting the parchment. Place on a cutting board and using a sharp knife, cut into desired shapes and sizes. Toss them in a bowl with remaining 1/2 TB arrowroot starch so that each side is coated. This will prevent them from sticking. You will find that most of it falls off anyway, this is why I don’t really count the carbs in the arrowroot starch.
Store in a mason jar in a dark, cool place for up to 7 days.


3 DIFFERENT FLAVOR OPTIONS:
If you want to flavor your marshmallows, after a light coating of arrowroot starch, sprinkle either matcha powder (I like this one), cocoa powder or even pumpkin spice seasoning and toss so that they are all lightly coated in delicious flavor!


Enjoy!
Maple Syrup Directions:
Use 1 cup Maple Syrup in place of NuNaturals Stevia Syrup. Add 1/2 cup water to the maple syrup in the sauce pan. Boil until it reached 240 degrees which can take up to 15 minutes. It’s best to use a thermometer for this. I use this one. Follow directions above. Allow to sit for 4 hours at room temperature before cutting.


